The overall goal of the class I'm currently enrolled in is to create content, get clicks, and then to analyze this data in Google Analytics. However, to do this, we need clicks! This blog post will cover creating a Facebook Ad. This is a very simple and painless process. I will lead you through the steps I took to create this ad.
Step 1: The first thing I did was head over to http://www.facebook.com/ads/create I then chose Clicks to Website. At first I didn't see the option Clicks to Website, so I began clicking on all the links to read the description. Here it says "Increase the number of visits to your website" BINGO! That's exactly what I wanted to do. The box on the right appeared with all this information as I clicked through the list on the left. From this list I chose Send people to your website. I then copied a link from my blog and pasted in that box. I made sure to choose a specific blog post, not just the site. I figured I would be able to see conversions on this specific link much easier.
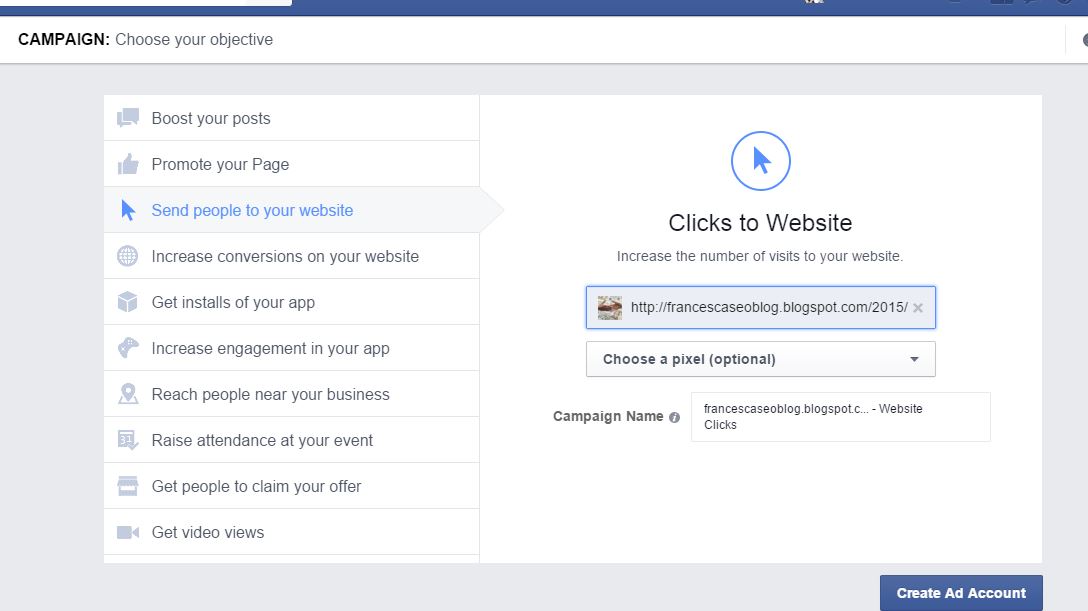
Step 2: The second step was creating an ad account. As I was going through the process again to make sure I had all these steps in order, I realized this window doesn't pop up again. This is most likely because I have already created an account. Here the information was already set.

Step 3: The third step is to define an audience, budget, and schedule.

Step 4: I was able to manipulate many variables, demographics, and interests. For this particular blog, I chose interested related to the topics here. Content marketing, inbound marketing, digital marketing, social media marketing, and online advertising. Facebook has major categories with many sub categories within the larger categories to choose from. This is a pretty neat feature! These interests come from the individuals' Facebook page. This makes me think about what type of interests I've listed on my Facebook page that has resulted in specific ads being shown to me.

Step 5: Next, I chose a budget. We were required to use a $25.00 budget to do this test. I set it at $5.00 per day, for 5 days.
 Step 6: The final step was creating the actual ad. I chose a photo, a headline, inserted some text, and then placed the order. However, I kept getting an error when I failed to enter an Instagram Account. Overall, this process was very simple. I am looking forward to viewing this data in Google Analytics.
No comments:
Post a Comment